


Making of seamless textures by Wojtek Buddy Starak
Making of seamless textures
Hi! This is my first tutorial, especially here on 3dtutorials.sk!
I want to show here my technique for making seamless textures for games, also how to create normal and specular maps. To not waste too much time on talkin I’ll start explaining asap. I’m using Photoshop 7.0, so tutorial is mostly for PS users but other applications offer really simmilar tools.
So, first, we need a good photo reference. I used this one straight from www.environment-textures.com
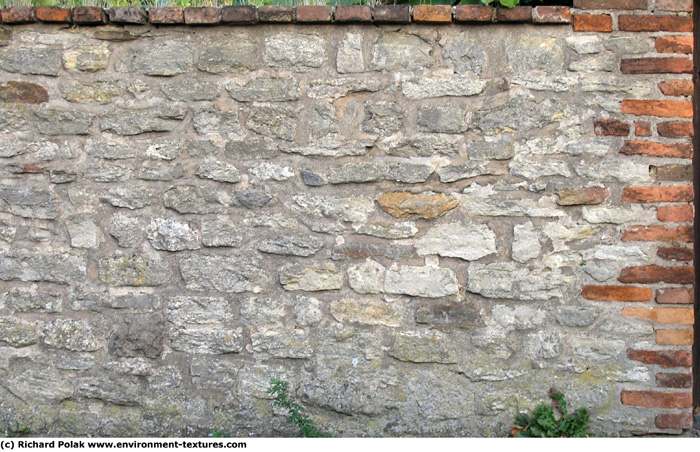
Original size was: 2421x1565px I resized it to: 1200x776.
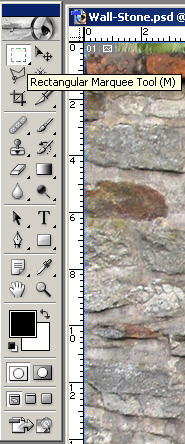
We need to pick a part of the photo we want to use as a texture, but first we need to select “Rectangular Marquee Tool“
set style to fixed size and set it to 512 px / 512 px
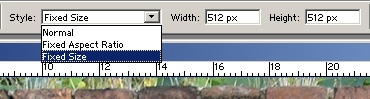
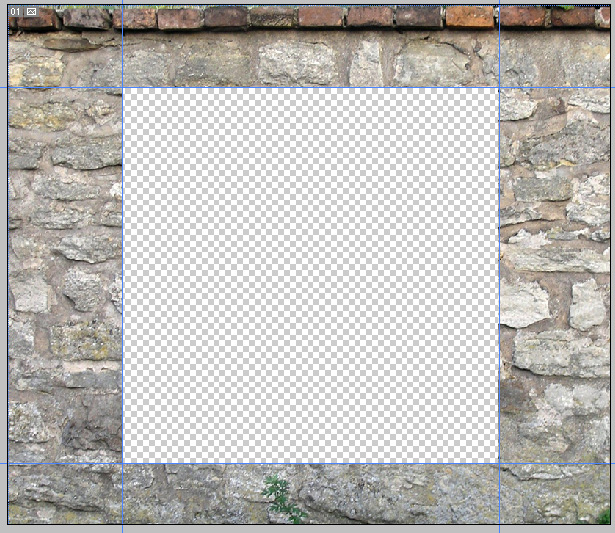
this is the size of the texture we gonna use”, “px” is important here, if we just type 512 selection will be 512 centimeters instead of pixels. Now just click on the photo and move around square marquee, find a good spot to use as center of texture but make sure there’ll be some margins on atleast on vertical and horizontal side of photo, to later use it to fix “seams”. Also try avoiding spots on the texture which are very characteristic, like the yellow stone on that wall, I leaved it in the selection to show later how to fix this.

Ok, when photo spot is found, just click “Ctrl+C” or select Edit->Copy. After this, create new document which will be automaticly in size of copied selection (512x512px), now paste it on the document. (Ctrl+V or Edit->Paste).
Now we need to come back to the photo reference we used, and delete (delete button:) ) this 512x512 selection. When that’s done, we have to, in order to get rid of ugly seams, copy one vertical and horizontal piece of the ref. But before that, we should set “Guide Lines” to help algining “Rectangular Marquee Tool“(this time with normal style) while selecting those margins.
To setup guides: You need to enable “Rulers” (white bars on left and top side of workspace, “Rulers” button is located View Tab). Also to enable Algin/Snap to the Guide Lines, You need to turn on “Snap” located in View tab, make sure that all options in “Snap To” submenu are on. To set the actual guidelines, (lines that help define proportions, use to snap/algin other objects, define exacly distance in cm, meters, pixels and so on.) You just need to drag them out from the white bars on top/left of the workspace, move them to the edges of deleted 512x512 selection, they will align automaticaly!
Now we can finally get rid of ugly seams mentioned above, create a selection with marquee tool on the top of deleted piece of ref, hit Ctrl+C and paste it on our 512x512 texture, drag it to bottom. Be sure You’ve selected new layer “Later 1”, choose Eraser tool and try to remove most of the top side of the copied margin, play around with opacity/flow values, it’ll help you define smooth blends if needed.
![]()
Do the same with vertical side but now drag the selection from right on the ref to left on the 512 document.
If everything went well You should end up with something simmilar to this: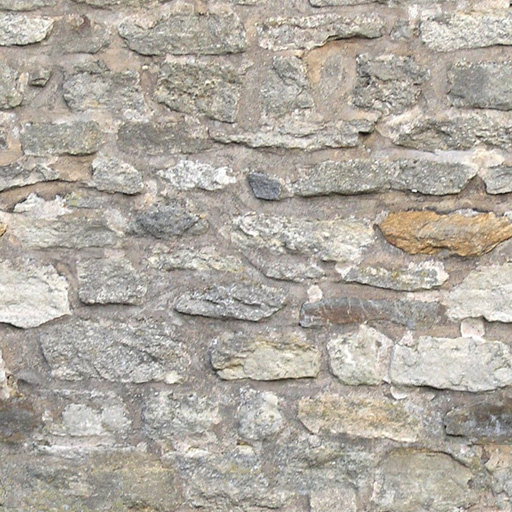
Note: You can use Ctrl+E to merge layers.
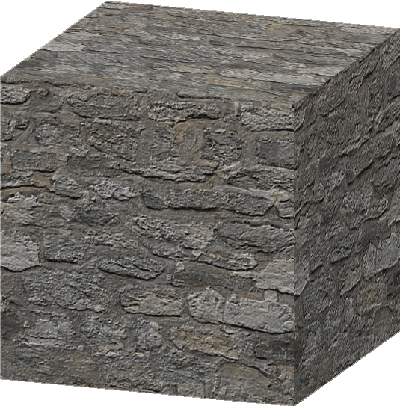
To check if texture tiles perfectly create a new document in 1024x1024 size and paste 4 times whole finished 512 texture. If option snap is enabled they will algin to themselfs and edges of image. Should look like this:
Looks good so far, I mentioned something about characteristic spots on the texture, which You can easly notice when they tile, in this one that “characteristic spot” is the yellow stone, to get rid of that color diference, create a new layer, select brush tool
to pick a color from image hold “Alt” and click place where You want to pic color from, I took color from one of the stones. Now paint over the yellow stone, use softbrush for that (right click on workspace, select one of the soft brushes, you can define size of it on top of the menu)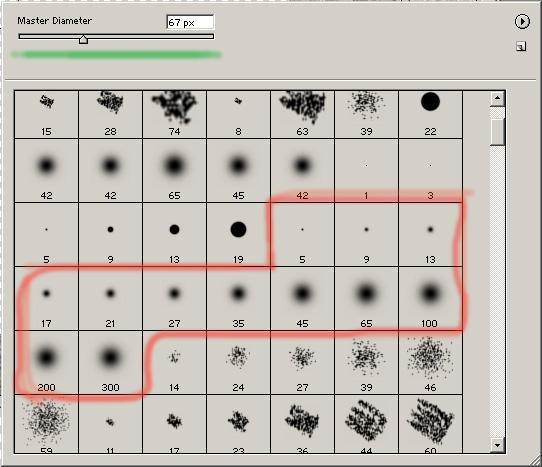
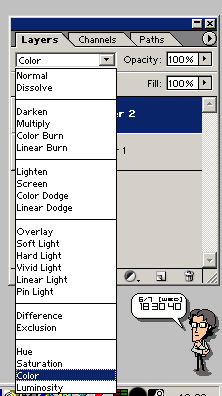
when You finish, change layer blending mode to “Color” (notice little Otacon helping me with work  ).
).
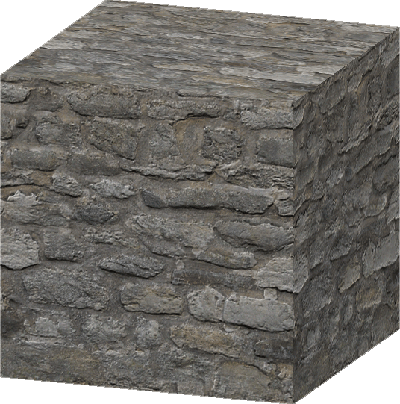
Tada! Stone have changed color, but it’s far from perfect, choose few diffrent colors and add some little details. What I ended with: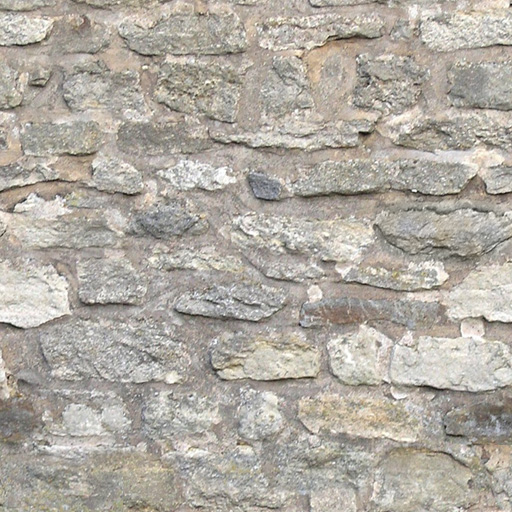
When you put it again on 1024 texture you’ll notice it looks far better. We can say that the texture is finsihed, all we need now are normal and specular maps. First save your new homemade texture into .tga file. There is several methods for making normal maps, I’m going to show an easy method, for this we’ll need Nvidia normal map plugin, install it and open your tga. In order to create normal map we need to desaturate image, Image->Adjustments->Desaturate. To create a basic normal map from it, click Filter->Nvidia Tools->Normalmap filter. Set it like this:
It’s simpliest normalmap you can create, here’s picture with them rendered on our texture.
It doesn’t look to good, we need to tweak it a little. Paint over desaturated image using black (deeper parts) and white colors (stuff sticking out), they simply define heights on the texture. Should end with something simmilar:
Now create normalmaps again (Filter->Nvidia Tools->Normalmap filter). Use scales to define how much “deep” we want texture to be. Set it to 0 and 3. Looks far better!
We want also a specular map which will define where should the texture “shine”, same as for normal map, desaturate image. (white - more spec, black - less spec) If we’ll use just desaturated map it will end looking like this:
In order to fix this, we need first to change brightness&contrast of image, Image->Adjustments->Brightness/Contrast. Tune up Contrast and Tune down Brightness. It will result in only few parts of the texture shine, like the stone should. Result:
When rendered ingame it will look far better.
Whole texture is done all that can be done are small fixes on corners of the texture but on this one it wasn’t needed and even if, after passing this tut You should know how to do that , great job if you passed through this tut! I hope it helped out.
(c) Wojtek "Buddy" Starak, buddy_gman@hotmail.com, www.blackwidowgames.com
Click for viewing tutorial on free3dtutorials .