Make Checkered Tile Floor Texture
How to Make a Checkered Tile Floor Texture
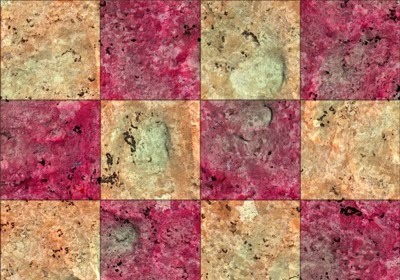
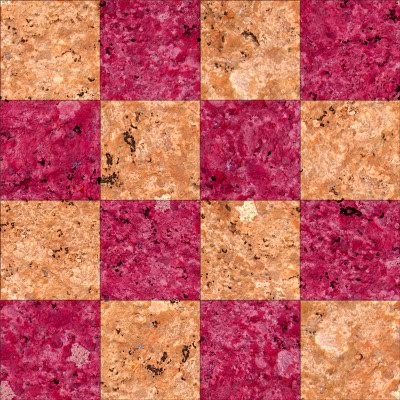
In this tutorial we'll learn how to make the following checkered tile floor seamless texture.
Step 1
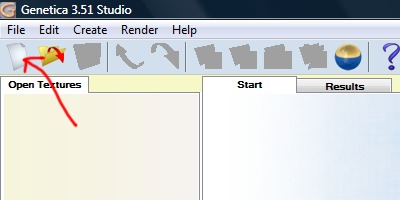
Load Genetica and then start a new document. If you don't have Genetica already, download it here.
Step 2
Genetica will automatically switch to the Nodes tab. With the Advanced Nodes category selected, drag a Synthesis node into the empty slot that can be found in the middle of the workspace.
The Synthesis node is the quickest way to get a texture started since it will automatically make seamless textures from photographs.
With our newly-created Synthesis node still selected, click the Edit button in the Properties panel.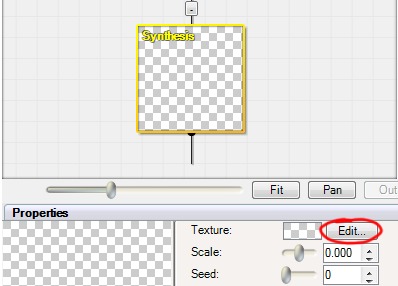
Step 3
The Texture Synthesis dialog that pops up is a lot of fun. With it you can create countless seamless textures from photographs, many of which take just a few seconds to create.
For this tutorial we’ll just pick one of the ready-made presets. From the Rock category, select the Red Mottled Rock preset, and then close the dialog by clicking OK.
Step 4
If you look closely at the texture we're creating, you’ll notice that the different tiles use the same base texture, but are colored differently.
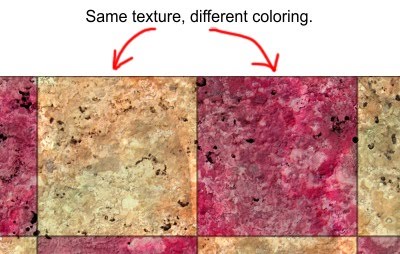
Although we could copy and paste the Synthesis node, that would create an inefficient texture because the material would need to render twice. Instead, drag the node to a blank spot in the workspace while simultaneously holding the Ctrl key.
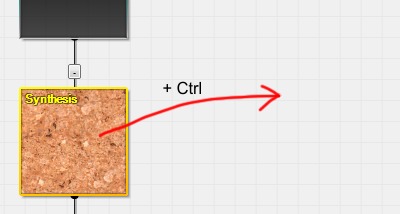
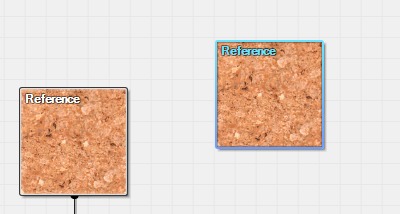
This results in two Reference nodes being created, both of which refer back to the original texture. A more detailed explanation of how this works is available here.
Step 5
Let’s modify the color of the second Reference node. With the Color section of the Library panel selected, drag a Change HSB onto the Reference node. In the menu that appears, select Insert Below.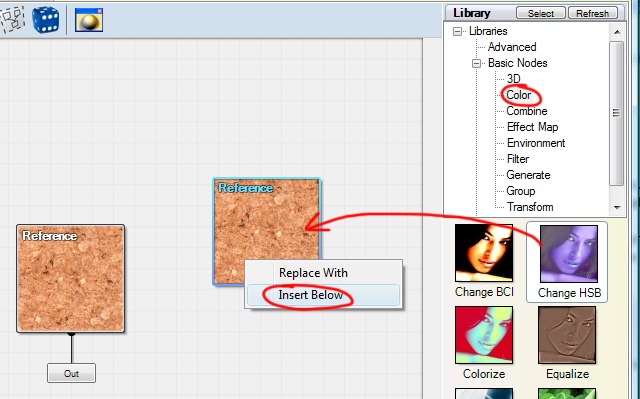
This causes the output of the Reference node to be passed into the Change HSB node for further modification. But the Change HSB won't actually do anything until its properties have been adjusted, so set its Hue property to -42.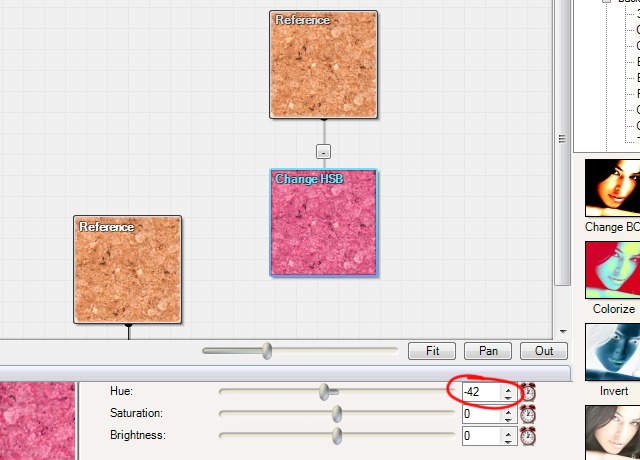
Step 6
Repeat the process, this time dragging a Change BCI node from the Library panel onto our newly created Change HSB, remembering to select Insert Below in the little menu that pops up. Set the Change BCI node’s Brightness property to -20, and its Contrast property to 13.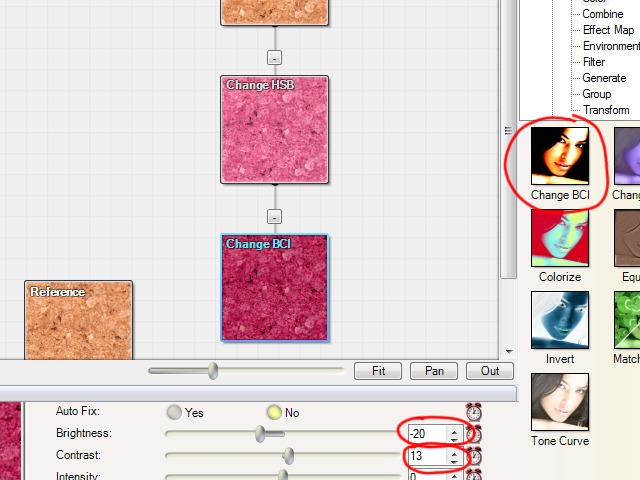
Step 7
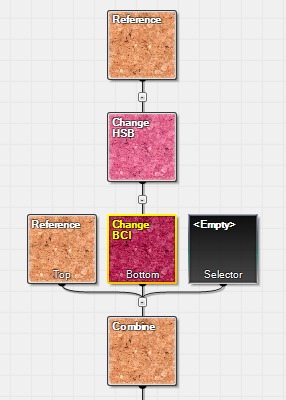
Now that we’ve created the two differently colored versions of the texture, it’s time to combine them. Insert a Combine node below the first Reference node.
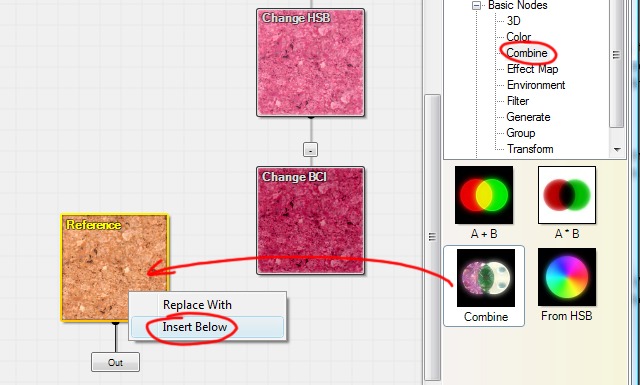
Then drag the disconnected branch into the Combine node's second input.
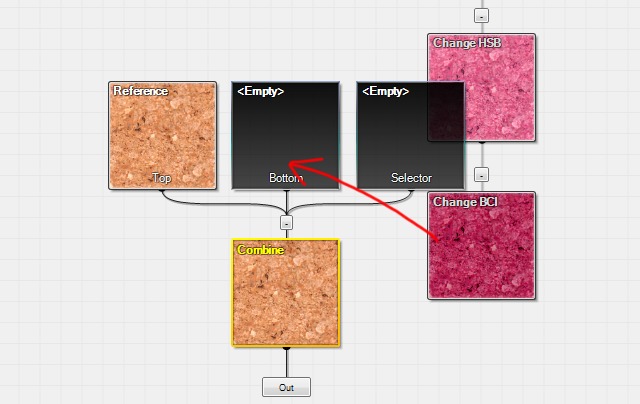
Your node tree should now look like this:
Step 8
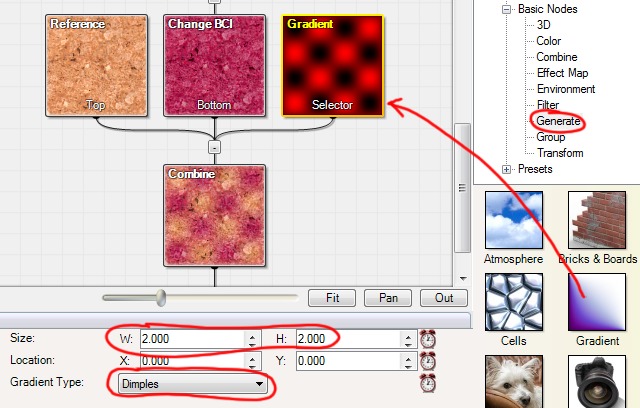
We need to tell the Combine node how to mix the two versions of the material together. To do that, drag a Gradient node into the Combine’s third slot. Then set the Gradient node’s Size property to 2 x 2, and its Gradient Type property to Dimples.
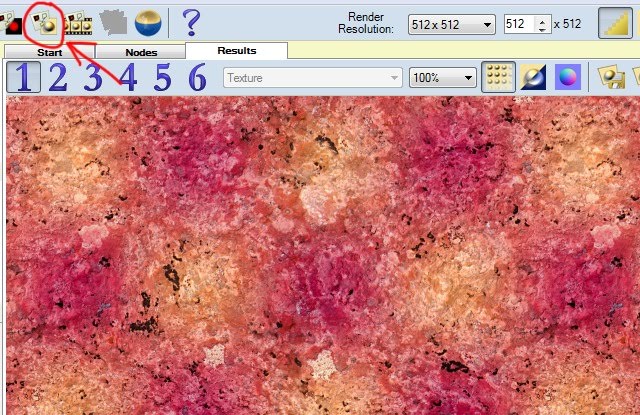
At any time during the tutorial you can click the Render Texture button to see how our texture is coming along.
Step 9
The checker pattern has started to take shape, but it needs to be sharpened. Insert a Change BCI node below the Gradient node, following the example of step 5. Then, set the Change BCI's Contrast property to 3000.
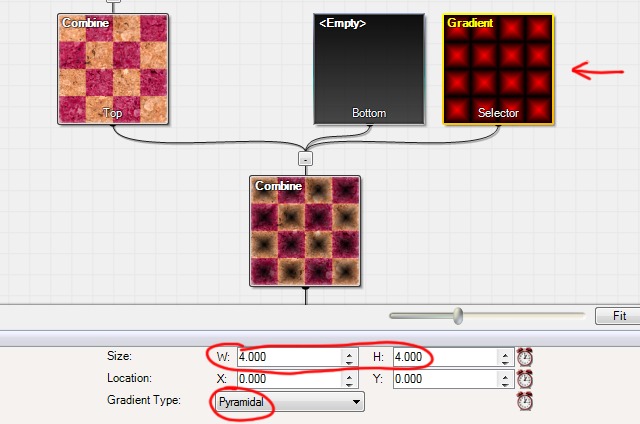
Now that our checker pattern has been created, let's accentuate the effect by adding thin lines between the checker squares. Start by inserting a second Combine node below the existing one.

Step 11
Insert a Gradient node into the newly-created Combine node's last input. Set the Gradient's Size to 4 x 4, and its Gradient Type to Pyramidal.
Step 12
Again we want to sharpen the Gradient node that we just created. Insert a Change BCI node below it, and set the Change BCI's Brightness to 49, and its Contrast to 3000.

Step 13
Select the final Combine node by clicking it, then set its First Input property to Input 2, and its Opacity property to 0.4.

Step 14
Here's the texture that we have so far:
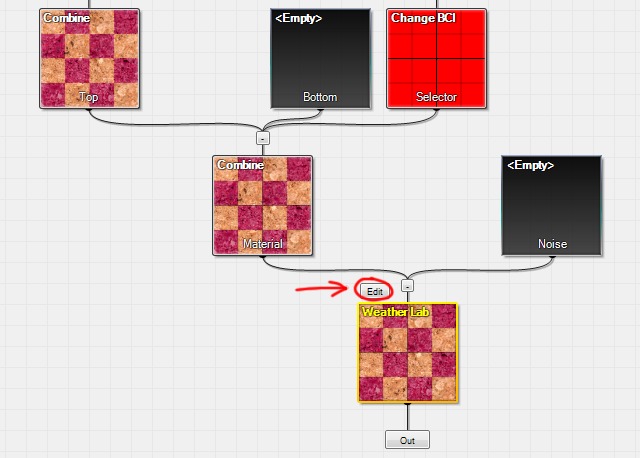
If you want a newer-looking version of the texture you can stop here. Otherwise, insert a Weather Lab below the final Combine node. The Weather Lab can be found in the Advanced Nodes category of the Library panel. Next, click the Edit button appearing over the Weather Lab, which will take you to a special tab containing the node's properties.
First, select the Adjust Color section and set the New Color Strength property to 80. This will give some parts of the texture a dirty, greenish tinge. If you'd like to change the color of the dirty areas, experiment with the New Color property that is also found in this section.

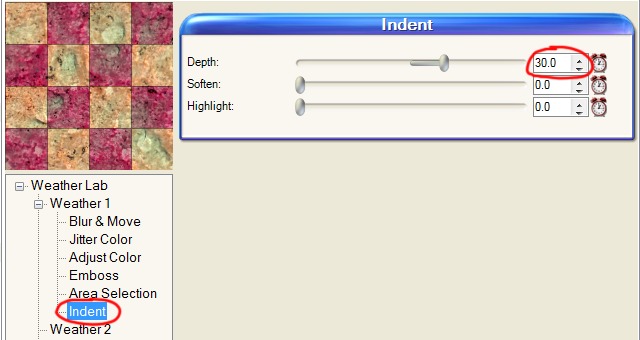
In the Indent section of the Weather Lab, set the Depth property to 30. This will give our texture a pitted appearance. To change the shape or frequency of the pits, experiment with the properties found in the Area Selection section.
Step 15
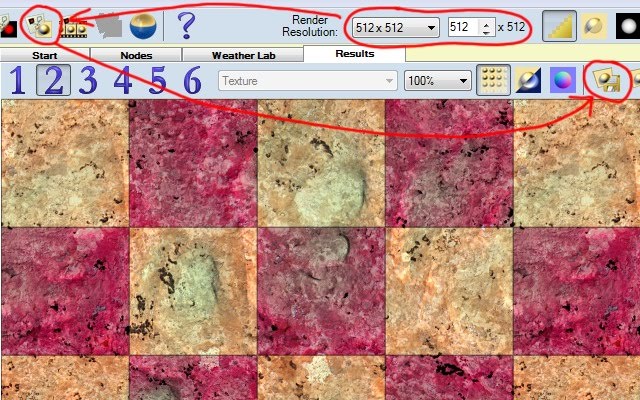
Our texture's complete! All that remains is to select our desired render size, to render the texture, and to export it.
Click for viewing tutorial on free3dtutorials .


